
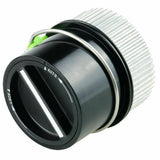


JADODE For 2004 - 2014 Ford F-150 F150 Parts IWE 4WD Auto Hub Lock Actuator
Free Shipping
FREE Standard Shipping | Located in: United States
Returns
30 days returns | Seller pays for return shipping
Specifications:
- Comes as a PAIR
- Fits both LH (Driver Side) & RH (Passenger Side) FRONT
- Replaces dealer part number: 7L1Z-3C247-A, 7L1Z3C247
- Direct replacements
- Built to strict quality control standards
Fits:
- 2003-2015 Ford Expedition 4WD
- 2015 Ford Expedition AWD
- 2004-2015 Ford F-150 4WD
- 2008-2012 Ford F-150 AWD
- 2006-2008 Lincoln Mark LT 4WD
- 2006-2014 Lincoln Mark LT AWD
- 2003-2015 Lincoln Navigator 4WD
- 2005-2015 Lincoln Navigator AWD
Installation Instructions
-
STEP 1: RAISE AND SECURE THE VEHICLE
- Raise the vehicle with a jack
- Secure the vehicle on jack stands
-
STEP 2: REMOVING THE CV AXLE SHAFT
- Remove the cap over the hub nut
- Pry off the wheel center cap with a flat blade screwdriver
- Remove the 13mm hub nut
- While holding the tire in place, remove the six twelve-point 12mm bolts from the CV joint
- Remove the 30mm bolt from the strut assembly using a breaker bar or ratchet and pipe
- Tap the nut with a hammer to loosen it, if necessary
- Pry the lower end of the strut assembly from the lower control arm with a pry bar
- Pull out the CV shaft
-
STEP 3: REMOVING THE FOUR WHEEL DRIVE ACTUATOR
- Pry off the actuator with a flat blade screwdriver
- Remove the three 8mm bolts from the four wheel drive actuator
- Disconnect the vacuum hoses from the actuator
-
STEP 4: INSTALLING THE NEW ACTUATOR
- Put the actuator into place
- Connect the vacuum hoses to the new actuator
- Start the three 8mm bolts by hand
- Tighten the three 8mm bolts
-
STEP 5: REATTACHING THE CV AXLE
- Reconnect the strut at the lower control arm
- Slide the CV Axle back into place
- Push the bolt through where the strut connects to the lower control arm
- Attach the nut
- Tighten the bolt to between 95-100 foot-pounds of torque
- Start the 12-point 12mm bolts into the CV axle by hand
- Tighten the bolts preliminarily
- Tighten the bolts to 25 foot-pounds in a crossing or star pattern
- Reinstall the 13mm nut on the end of the axle
- Reinstall the cap over the nut
- Reinstall the center cap
- Lower the vehicle
Shipping, Returns & Fitment
Before ordering a vehicle- or trailer-specific part, verify the year, make, model, engine, drivetrain, installation position, axle rating, bolt pattern, bearing numbers, and any OEM or interchange number shown in the listing.
Review our Shipping & Returns information and Refund Policy before purchase. For an RMA, fitment question, or return involving an installed part, contact Jaautousa support before shipping the item back.
Fitment, Installation & Returns
Confirm every applicable specification before ordering. A matching vehicle family or axle capacity alone does not guarantee fitment.
- Review the Jaautousa fitment and ordering checklist
- Review routine vehicle maintenance and safety basics
- Read Shipping & Returns information
- Review the Refund Policy and return-fitment rules
- Contact Jaautousa before ordering if fitment is uncertain
Safety: Use the product instructions and vehicle or equipment manufacturer specifications. Have braking, towing, electrical, suspension, and load-bearing work inspected by a qualified professional when required.